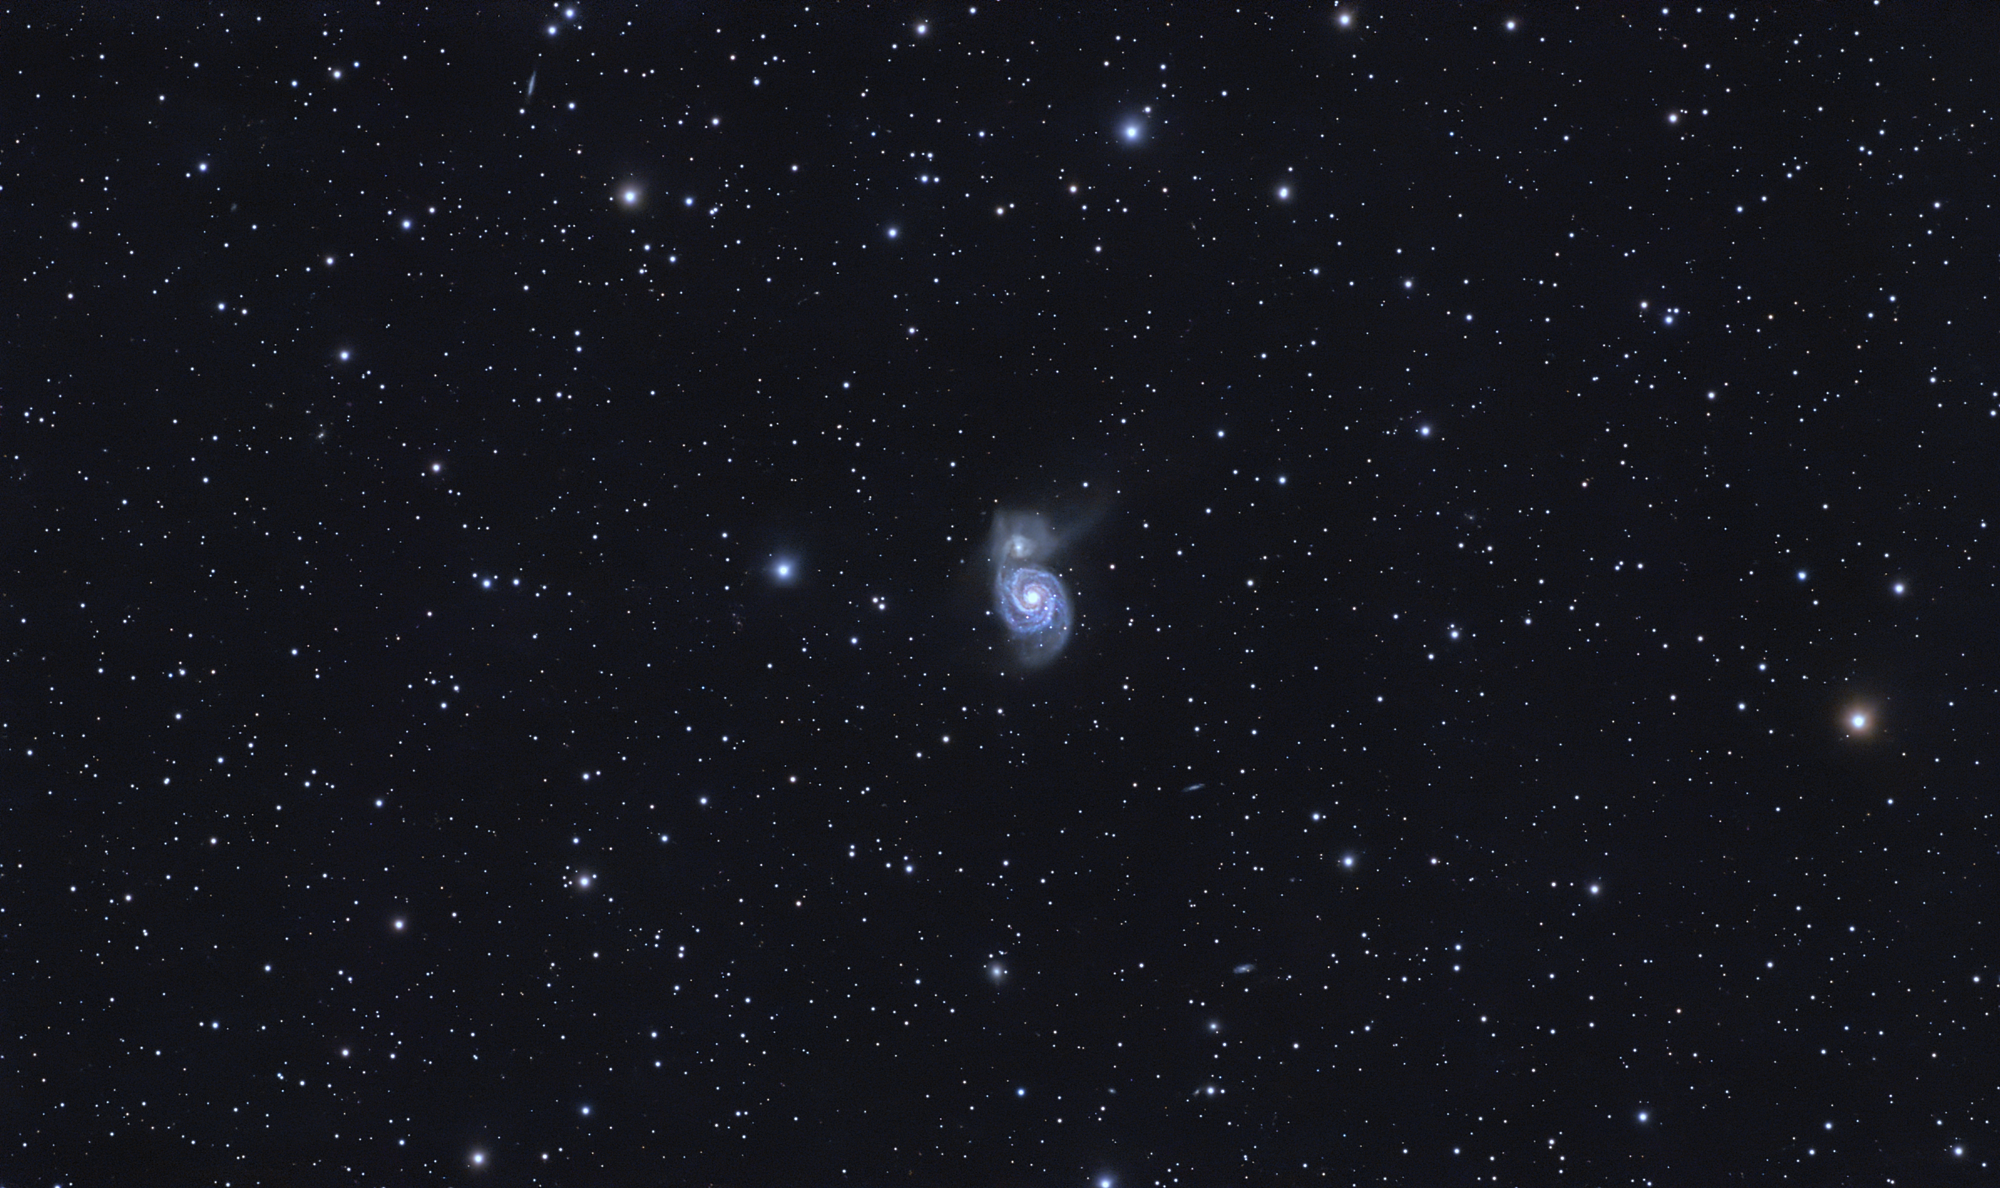
Astrophotography is the practice of capturing images of the night sky using a camera and an optical instrument. Unlike conventional photography, the subjects are not reflective — they emit or scatter their own light across distances measured in light-years. Every image is a record of photons that have traveled through interstellar space and arrived at a sensor a few centimeters wide.
That context matters. The technical discipline of astrophotography exists to maximize the amount of useful signal captured from those photons and minimize the noise that competes with them.

How Astrophotography Differs from Regular Photography
In daylight photography, light is abundant. The challenge is controlling too much of it. In astrophotography, light is scarce. The challenge is accumulating enough of it over time to distinguish a real object from the electronic noise the sensor generates.
This is why a single astrophotography frame often looks like nothing — gray, grainy, featureless. It is not a failed image. It is one measurement. The final result is built from hundreds or thousands of such measurements stacked together, with noise progressively averaged out and signal progressively reinforced.


The Four Core Concepts
Signal
Signal is the light from your target — the photons emitted by a nebula, reflected by a galaxy, or scattered by a star cluster. More signal means more detail. Signal accumulates with time. A longer exposure and more frames both increase the total signal in your stack.
Noise
Noise is everything that is not signal. It includes read noise generated each time the sensor reads out a frame, dark current generated by the sensor’s own heat, and sky background from light pollution. Noise does not average away perfectly but it diminishes relative to signal as integration time grows.
Signal-to-Noise Ratio
The signal-to-noise ratio (SNR) is the number that determines image quality. A high SNR means the target detail stands clearly above the noise floor. A low SNR means the target is buried. Every decision in astrophotography — exposure length, gain setting, filter choice, number of frames — is ultimately a decision about SNR.
Integration Time
Integration time is the total amount of signal-collecting time across all stacked frames. It is the single most important variable under your control. Two hours of integration on a target will always produce a cleaner result than thirty minutes on the same target, regardless of the equipment used.


Calibration Frames
Calibration frames are exposures that measure and remove the sensor’s own contribution to the image. The most important for the DWARF 3 are dark frames, which are exposures taken with the lens covered, at the same exposure length and gain as your light frames. These measure the sensor’s heat-generated noise pattern, which is then subtracted from your stacked data.
Without calibration frames, stacking reinforces sensor artifacts instead of suppressing them. The result is a muddy background regardless of how many frames you collect.

Equipment and Its Role
Equipment determines the speed at which signal is collected and the quality of the optical path. A larger aperture telescope collects more photons per second. A cooled sensor generates less dark current. A precise mount allows longer exposures without star trailing.
The DWARF 3 smart telescope is a compact, entry-level instrument that automates the mechanical complexity of astrophotography — tracking, plate solving, and live stacking — while operating within the physical constraints of its 35mm aperture and uncooled sensor. Understanding those constraints is the starting point for using it effectively.
Concept Posts in This Section
Each post below covers one foundational concept in depth.
Why DWARF 3 Images Look Blurry or Noisy: Understanding Signal vs. Noise
What raw data looks like, why early images disappoint, and what SNR means in practice.
What is the Bortle Scale?
How sky brightness is measured, what each Bortle class means for your imaging, and how to find your rating.
What are Dark Frames and Why Do They Matter?
How calibration frames work, when to take them, and what happens to your data without them.
Understanding CMOS Sensors in Astrophotography
How the Sony IMX678 sensor works, what uncooled means in practice, and how temperature affects your data.
What is Plate Solving?
How automated star recognition works, why the DWARF 3 uses it for GoTo, and what to do when it fails.
Integration Time: How Much is Enough?
A data-driven look at how stacking depth affects final image quality across different target types.
Frequently Asked Questions
What is astrophotography?
Astrophotography is the practice of recording images of the night sky using a camera and telescope. The subject matter ranges from the Moon and planets to galaxies and nebulae billions of light-years away. The core discipline is signal accumulation, meaning collecting enough photons over time to distinguish the target from sensor noise.
How is astrophotography different from regular photography?
In regular photography, light is abundant and the challenge is controlling it. In astrophotography, light is extremely scarce. A single frame typically looks gray or featureless. The final result is built by stacking hundreds or thousands of frames, progressively reinforcing signal while averaging out noise.
What is signal-to-noise ratio in astrophotography?
Signal-to-noise ratio (SNR) is the relationship between the light from your target and the electronic noise the sensor generates. A high SNR means the target detail stands clearly above the noise floor and can be processed without destroying it. Every setting decision, whether exposure length, gain, filter, or number of frames, is ultimately a decision about improving SNR.
How long does astrophotography take?
Total integration time is the key variable. Bright targets like the Orion Nebula produce usable results in 1 to 2 hours. Faint targets like distant galaxies or dark nebulae may require 5 or more hours across multiple sessions. The DWARF 3 automates the capture process but cannot bypass the physics of light collection. More time always produces better data.
What are dark frames and why are they required?
Dark frames are exposures taken with the lens covered at the same exposure length, gain, and sensor temperature as your light frames. They measure the sensor’s fixed-pattern electronic noise, which stacking then subtracts from your data. Without matched dark frames the final image will show muddy backgrounds and color artifacts regardless of integration time.