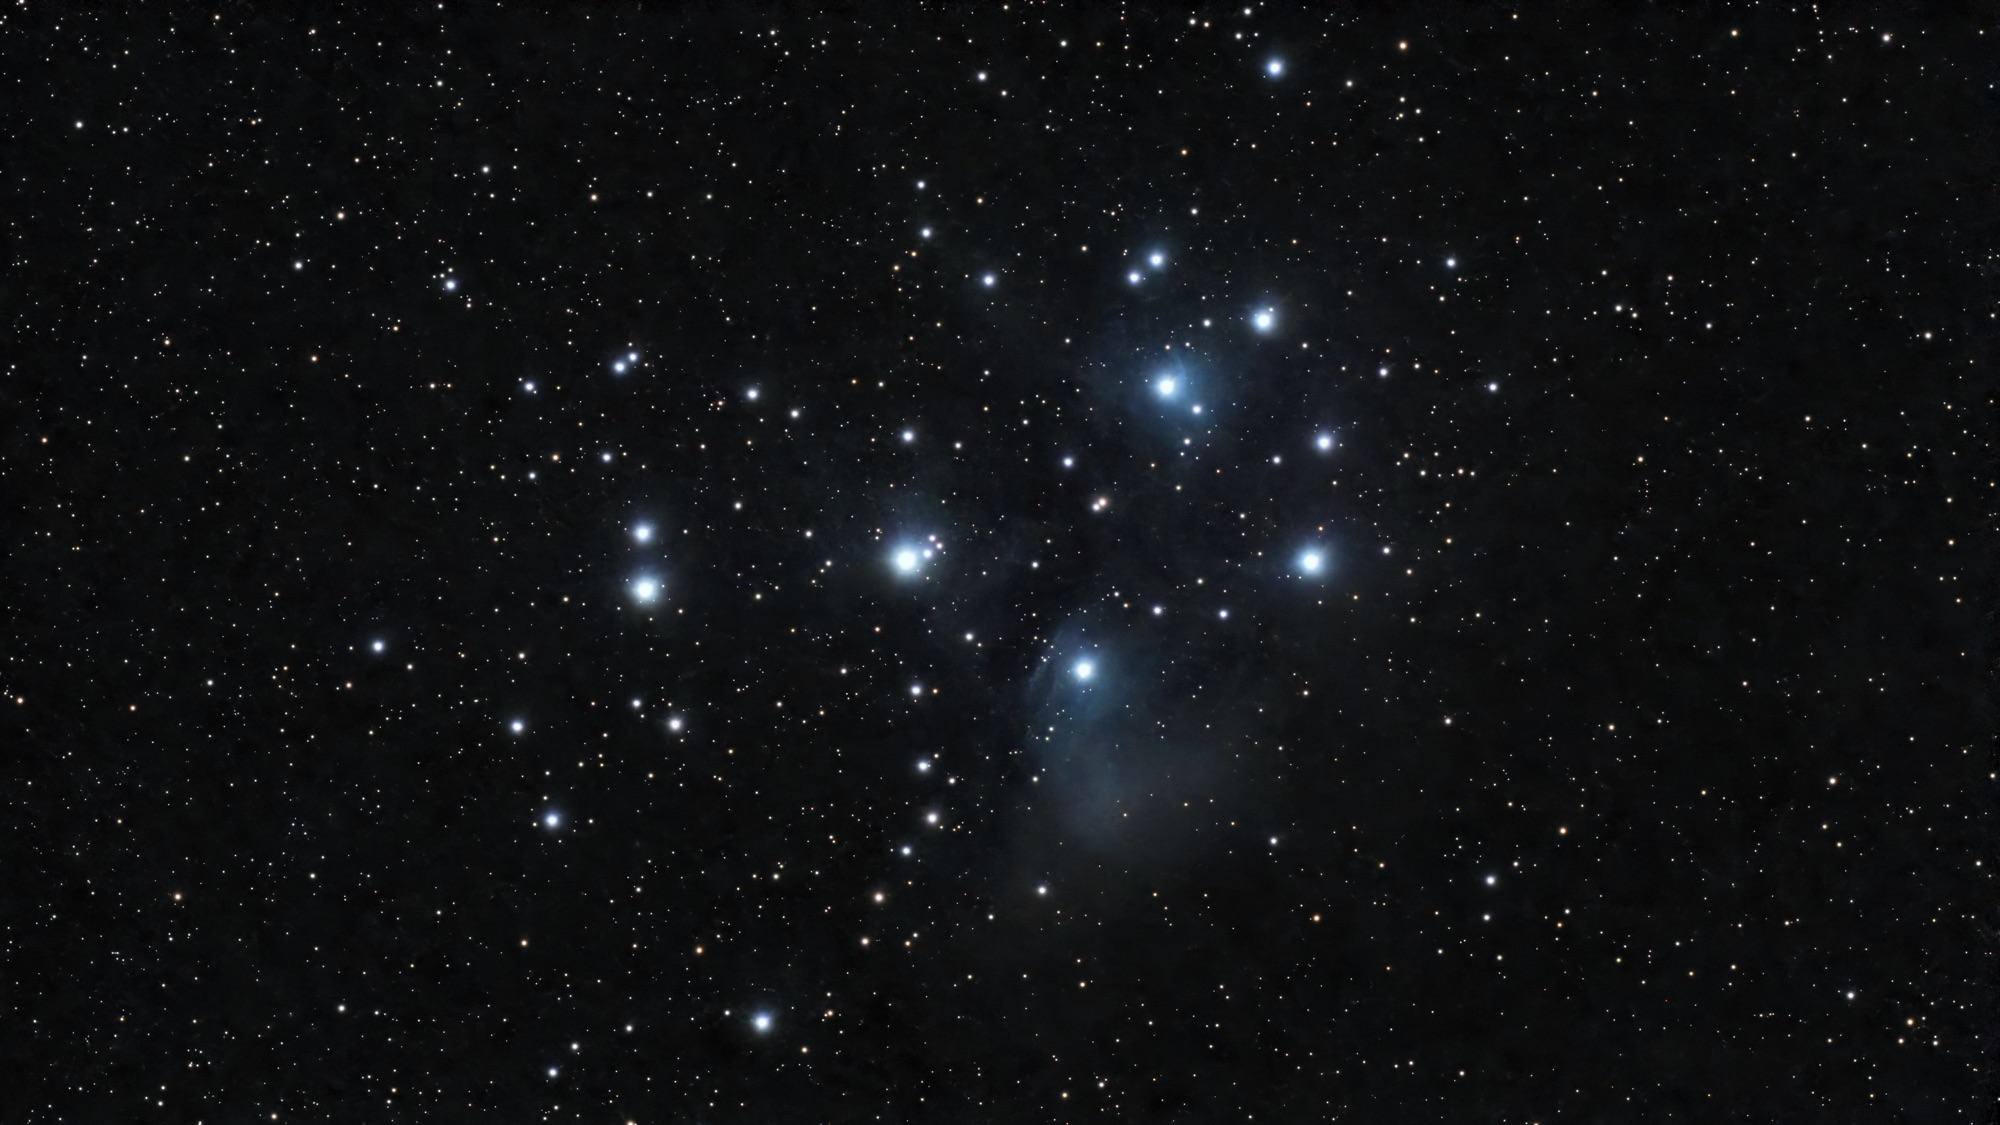
The Pleiades is one of those targets that looks deceptively simple. Seven bright stars, a well-known reflection nebula, and enough contrast to make any image pop on social media. But processing M45 cleanly on the DWARF 3 taught me something practical about Stellar Studio’s processing sequence and why I now run every image through a second step in Snapseed.

This was a 30-minute test session before a longer run on M106. 60-second subs, gain 50. I was not expecting a keeper. What I got instead was a useful processing comparison.

The Stellar Studio Sequence
Stellar Studio has three tools I use on every DWARF 3 image: denoise, star correction, and Auto. Auto is an AI processing tool that handles the full image treatment in one step. What I have found through testing is that the order matters. Running denoise first, then star correction, then Auto produces noticeably better results than other sequences or using Auto on the raw output alone.
On this Pleiades capture the sequence worked as expected. Denoise cleaned up the sensor noise at gain 50. Star correction tightened the bloated cores on the brighter cluster members – Alcyone, Atlas, Electra – which would otherwise dominate the frame on a wide-field target. Auto then processed the cleaned data and brought out the reflection nebula around Merope.
The result is solid. The blue nebulosity is visible, star colors are accurate, and the detail in the cluster is clean. But the background carries a grey cast that flattens the overall image. At 30 minutes of integration the signal is limited and the output reflects that.
Before and After: Stellar Studio vs Snapseed Finish

The Snapseed Step
Snapseed is a free mobile app from Google. It is not an astrophotography tool, but four of its adjustments map directly onto the problems that Stellar Studio leaves behind on shorter integrations. Here is the exact sequence I used on this image.
Step 1: Adjust

Adjust is the starting point. This is where I pull the blacks down to crush the grey background cast and apply a controlled contrast lift to separate the nebulosity from the sky. The key is not to overdo contrast – the goal is to recover what Stellar Studio compressed, not to add artificial punch.
Step 2: Dehaze

Dehaze increases local contrast across the image and particularly helps with the subtle grey veil that shorter integrations produce. On this Pleiades capture it sharpened the perceived boundary between the Merope nebula and the background sky without introducing halos around the bright stars.
Step 3: Curves

Curves gives finer control over the tonal response than the Adjust sliders alone. Here I made a gentle S-curve to hold the shadow depth from the previous steps while recovering slight detail in the brighter nebula regions. The blue channel specifically benefits from a small lift in the midtones to preserve the accurate color on the cluster’s hotter stars.
Step 4: White Balance

The final step. Stellar Studio’s Auto processing can introduce a slight warm shift on broadband captures. A small correction in White Balance restores the blue-white color of the A and B type stars in the cluster and keeps the reflection nebula tonally accurate. This is a subtle adjustment – the Pleiades should look cold.
The result of all four steps is the final image above. Snapseed here is not correcting a mistake in Stellar Studio. It is a second processing layer that the signal at 30 minutes needs. The two tools are doing different jobs.
What This Means for Shorter Sessions
Not every session needs to be a multi-hour integration. The DWARF 3 at 60 seconds, gain 50, 30 minutes on a bright target like M45 produces a publishable image if you handle the processing correctly. Stellar Studio for noise, star correction, and AI processing in the right sequence. Snapseed for background and contrast. That pipeline is repeatable and fast.

What it does not do is reveal faint extended structure. The outer reaches of the Merope Nebula and the broader IFN across the Pleiades field need significantly more integration time. That is a session for another night.
What Comes Next
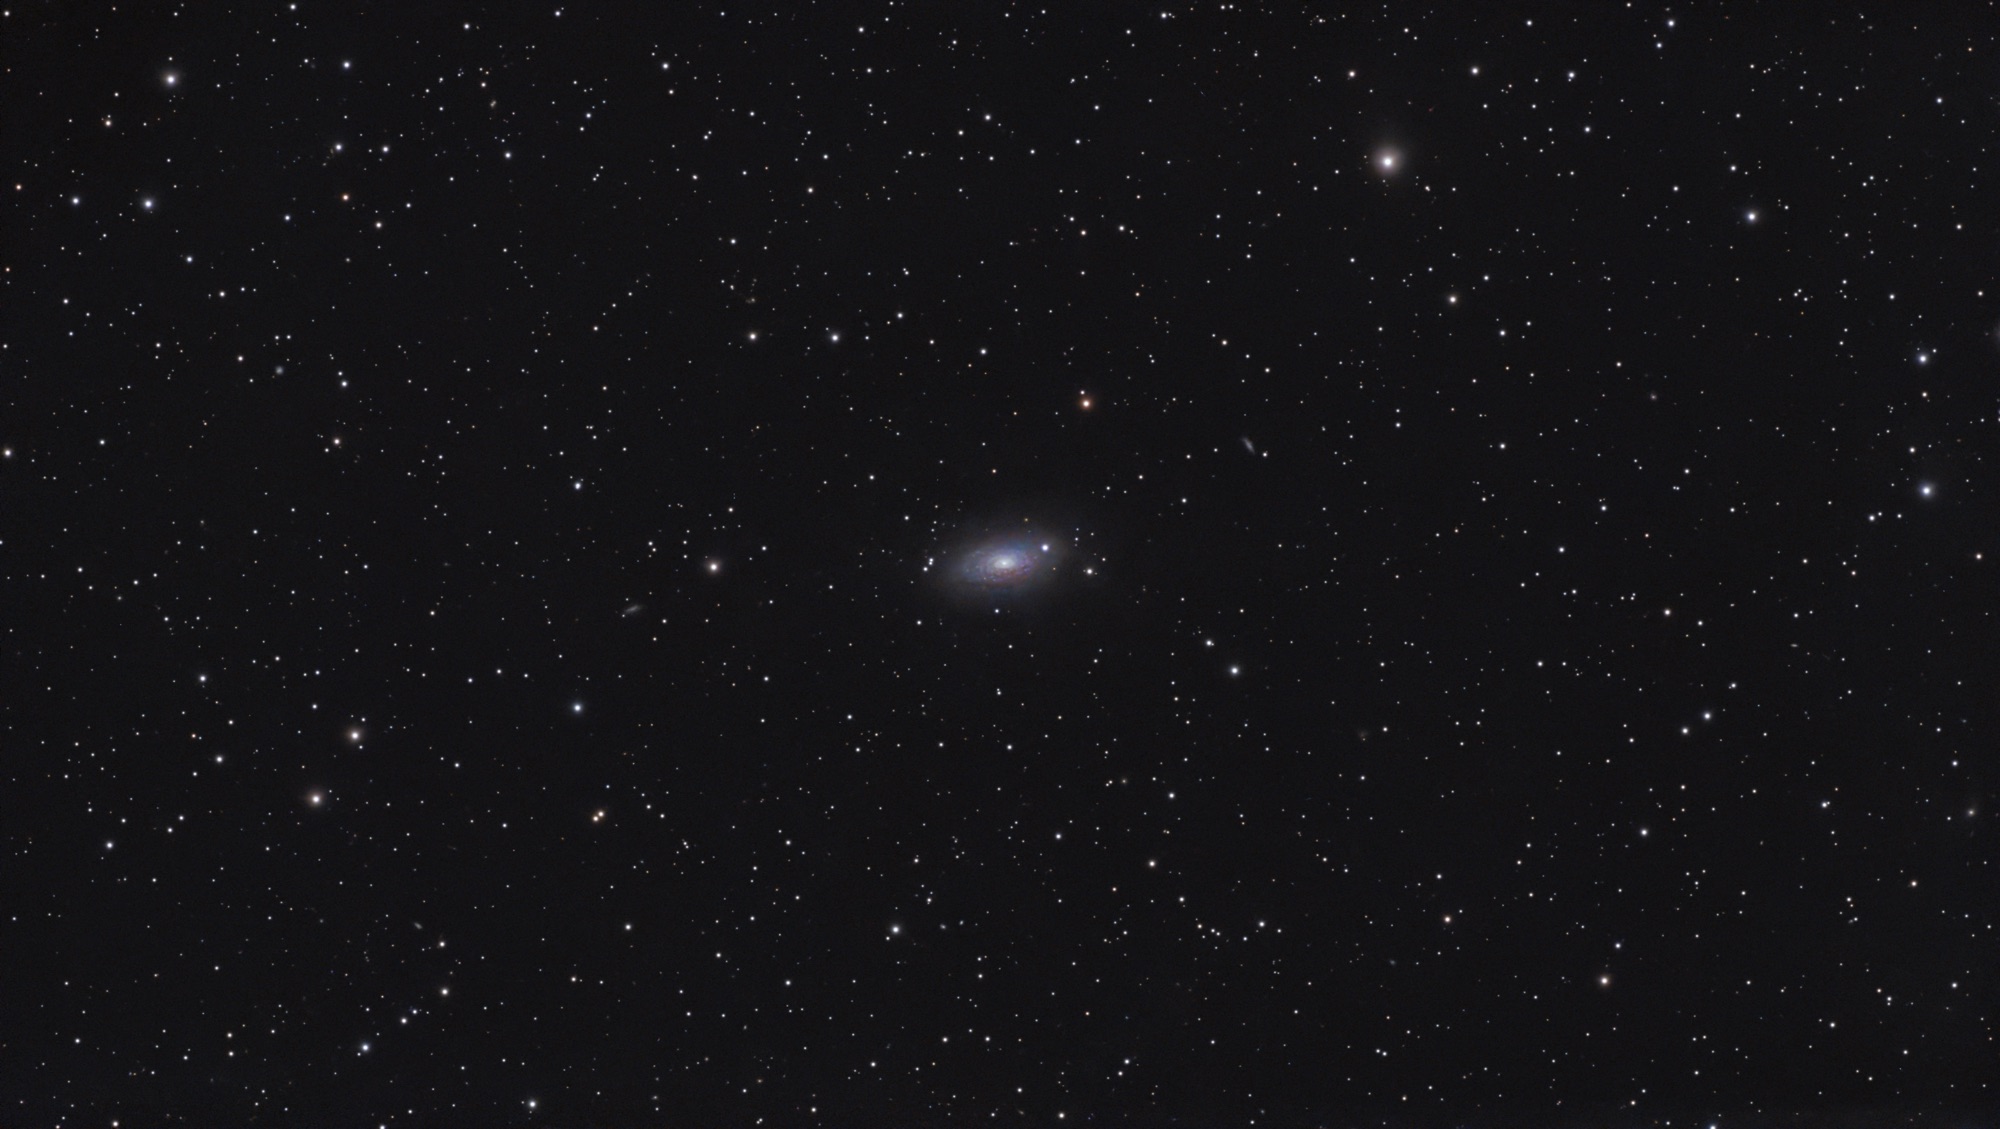
This Pleiades capture was a calibration run before a longer session on M106 – and that post is coming soon. M106 itself sits 23 million light years away, but the frame also captured NGC 4226, a background galaxy at 390 million light years. Same DWARF 3, same session, two objects separated by 367 million light years of cosmic distance in a single image.
After M106 comes what I consider the most technically demanding result I have produced with the DWARF 3 so far: a 37-hour integration on M81. That session incidentally captured UGC 5210 in the same field – a galaxy at 200 million light years, sitting far behind M81 which is only 12 million light years away. More on that shortly.
Frequently Asked Questions
What Snapseed tools work best for astrophotography post-processing?
For DWARF 3 images processed through Stellar Studio, the four most useful Snapseed tools are Adjust, Dehaze, Curves, and White Balance. Used in that sequence they address background cast, local contrast, tonal control, and color accuracy without requiring any dedicated astrophotography software.
Does the order of processing in Stellar Studio matter?
Yes. Running denoise first, then star correction, then Auto produces better results than other sequences. Auto performs better when it is working on data that has already been cleaned of noise and star bloat.
Can Snapseed damage an astrophotography image?
It can if the adjustments are pushed too far. Dehaze applied too aggressively introduces halos around bright stars, and Curves pulled too steeply clips highlight detail in the nebula. The goal is correction not enhancement — subtle adjustments only.
Is 30 minutes enough integration time on the DWARF 3 for the Pleiades?
For the bright core of the cluster and the Merope reflection nebula, yes. For extended structure like the full IFN across the Pleiades field, no. 30 minutes at gain 50 is a starting point, not a finished deep-sky result.
Why does the DWARF 3 produce a grey background cast on shorter integrations?
The grey cast comes from limited signal-to-noise ratio at shorter integration times. Stellar Studio’s Auto tool processes the full tonal range and with limited signal it lifts the background. More integration time gives Auto more signal to work with and the result is cleaner before Snapseed is needed.
What is the difference between the Pleiades and the targets in your upcoming posts?
The Pleiades sits roughly 440 light years away. M106 is at 23 million light years and shares its frame with NGC 4226 at 390 million light years. The M81 post captured UGC 5210 at 200 million light years in the same field as M81 at 12 million light years. The processing and integration requirements scale significantly with target distance and surface brightness.


Leave a Reply